Facebook Pinterest Teachers Pay Teachers You Tube Image Map

August 22, 2015

It's All About the Money


Howdy from a Texas gal excited for the opportunity to share with you on this AMAZING blog! I am a passionate person who finds her greatest joy in teaching. I hope I can teach you something today or at least give you the extra boost you've been needing to start your own financial literacy program in your class!


Money. 

Is it the root of all evil or the savior of the civilized world? Regardless of how we interpret the theory of this evolved bartering system, there is no arguing the fact that money is an integral part of our everyday lives, and that learning how to make it, manage it, and invest it should be an essential part of our education system. Let’s face it, we see example after example of people who manage to make a fortune, only to end up ruined after a few years. Or, we see examples of people who grind away year after year, only to live paycheck to paycheck and never get ahead.
Not every one of our students will become doctors, lawyers, or engineers. In fact, not all of our students will even go to college. But one thing they will all definitely encounter as they progress in life is the need to manage money. I believe that this is the single most important way we as teachers can make an impact on our students’ lives.

So how can we make a difference?    

By integrating financial literacy into our classrooms!


Yes! I know our days are filled with PLC meetings, paper work, ARDs, test prep, and the like. There is little time for a bathroom break or a decent lunch, much less, time to fit in an extra program. But I will tell you from experience, there is NOTHING more rewarding than knowing that you have possibly altered the trajectory of a life by simply dedicating a few moments of your day to helping students discover what it means to become financially successful.


 In the next sections of this blog post, I’m going to share with you how I’ve found success in my own financial literacy program and then I’ll lay out a week-by-week schedule to help you run your classroom economy without getting overwhelmed in the process! You can use all your own thoughts and materials or you can check out everything I use in my classroom in my EDU-ENTERPRISES Financial Literacy Program at my TpT store.  DISCLAIMER: There is no clear right way or wrong way to invest in your students, and these are just the ways I’ve found that work for me.


My students must EARN every dollar they get! They can sometimes receive “bonuses” by going above and beyond in their work or actions, (Great for classroom management!) but the majority of their income—well at least before they begin investing- comes from their job. In my class, I limit the number of jobs available. This forces the students to become competitive in their application process and ensures them that if they fail to complete the job to the boss’ (MY) expectations, there will be someone waiting to snatch up their position. As the year progresses, students can make more money by investing into businesses, but more on that later.


In the beginning of the year, I always pay my students with some sort of paper currency. Here's a link to my FREE printable currency. Some kids hold on to it tightly, while others’ cash goes missing either to loss, bad trades, or (SADLY) theft. I don’t feel bad for them though. I secretly hope some of these misfortunes occur among the students so that they create real understanding of the importance of keeping their money safe. Some of these students find a sudden interest in opening a bank account. I offer my students two banking plan options: one with a monthly fee and one with a minimum balance, and I use a simple excel spreadsheet to keep track of their accounts. I also print debit cards (I don’t use credit because my students are a little younger) and require the students to have their debit card before completing any transactions.

In keeping to the real-life focus of my program, I require my students to pay monthly expenses such as a desk rental fee, and I never just give them replacement supplies for free. It’s no fun for the students to see their money go, but that’s life!

Some students find their true money-making abilities in entrepreneurship. Three times a year, I open up the classroom as a Market. Half the students are producers and half are consumers. I walk the producers through the process of planning, marketing, and running a successful business. It’s amazing how the students develop business sense so organically. One market day, a sweet little girl decided to provide brown paper sacks to her customers when they purchased her bracelets. The other businesses had not had the same foresight as she had.  As the customers loaded up on all their new purchases, they quickly realized that it was difficult to handle all their loot.  Before long, I heard a boy say that he was going to buy a bracelet just to get the brown paper bag. By the end of the sale, the little girl was out of bracelets and every single customer had a brown paper sack. Not surprisingly, when the next Market Day rolled around, almost every producer offered some sort of bag to their customers. An important lesson was learned by all of the students, and no direct teaching was required.


Follow my Market Days Pinterest Board for ideas for your students!

I share my pins with my students to help inspire them!


Implementing a quality financial literacy plan takes all year, but it doesn’t have to take all day.  In just a few minutes a week, your class can become a thriving economy.  Here’s a week-by-week schedule that can help you from getting overwhelmed in the process:

Before you get started, you will need to:

  • Think about what class jobs you’d like.
  • Think about what expenses your students will have to pay each month.
  • Decide which currencies you’d like to have in your classroom. Think about creating a spreadsheet in excel to use as your classroom bank or research other digital products that you can use. There are many cool resources available at low or no cost.  If your students have easy access to electronic devices, check out Bankaroo- it’s free! I’ve personally spoken with the owner of the application and am very excited to help educators discover this product. You’ll also need to decide when your bank will be open. It can be a small amount of time each day or each week.
  • Decide how many Market Day experiences you’d like to have during the year.  I usually do three sales per year so that the students have the opportunity to see their businesses grow as they use what they’ve learned to tweak their business practices. You can split your class into two groups and allow them to take turns being producers and consumers at the market day.


Still feeling overwhelmed? Check out my
EDU-ENTERPRISES
Financial Literacy Program
.
It has everything you need so you'll be ready to go! 

Implementing Your Program Week by Week

Week
Making Money
Managing Money
Investing Money
FIRST QUARTER
1
Introduce your class jobs and begin accepting applications.


2
Select your new employees.
Introduce bank accounts and begin accepting applications.

5
Begin accepting new job applications.
Have students pay their bills.

6
PAY DAY! Announce employee of the month! Select your new employees.


7


Introduce Market Day. Allow students to begin planning their business relationships and business plans.
8

Prepare consumers for market day by teaching them about writing checks, using debit cards, and keeping track of expenses.

9


Hold your first market day!
SECOND QUARTER
Week
Making Money
Managing Money
Investing Money
10
Begin accepting new job applications.
Have students pay their bills. 
Have students reflect on what went well and what went poorly with their business.
11
PAY DAY! Announce employee of the month! Select your new employees.


14
Begin accepting new job applications.
 Have students pay their bills.

15
PAY DAY! Announce employee of the month! Select your new employees


16


Allow students to begin planning their business relationships and business plans for the next Market Day. If the student was a consumer on the last market day, I assign them producer for this one.
17

Prepare consumers for market day by teaching them about writing checks, using debit cards, and keeping track of expenses.

18


Hold Second Market Day
THIRD QUARTER
Week
Making Money
Managing Money
Investing Money
19
Begin accepting new job applications.
 Have students pay their bills.
Have students reflect on what went well and what went poorly with their business.
20
PAY DAY! Announce employee of the month! Select your new employees.


23
Begin accepting new job applications.
Have students pay their bills. 

24
PAY DAY! Announce employee of the month! Select your new employees.


25


Allow students to begin planning their business relationships and business plans for the next Market Day. By now, all students should have experienced being both a producer and a consumer. I allow them to pick which role they’d like to have for our final market day.
26

Prepare consumers for market day by reviewing writing checks, using debit cards, and keeping track of expenses.

27


Hold Final Market Day
FOURTH QUARTER
Week
Making Money
Managing Money
Investing Money
28
Begin accepting new job applications.
Have students pay their bills. 
Have students reflect on what went well and what went poorly with their business.
29
PAY DAY! Announce employee of the month! Select your new employees.


32
Begin accepting new job applications.
Have students pay their bills. 

33
PAYDAY! Announce employee of the month! Select your new employees.


36

Have an end of year auction so students can spend all their money. I usually have students donate items to the auction. It teaches charity and saves the teacher from having to buy things to auction off.


Still have questions about starting your own classroom economy? Feel free to contact me at CassiNoack@gmail.com.
You can also visit my blog at cassinoackteach.blogspot.com
or my store at Cassi Noack Teach.


Cassi Noack is a wife, mother, and teacher from Tomball, Texas. With over a decade of teaching experience, she couples her creativity with what she's learned along her journey to help her students find success in the classroom. Cassi currently teaches a 4th grade self-contained class full of the best kids in Texas.

August 3, 2015

Get Organized!

It's Back to School Time...Time to Get Organized!

I'd like to think I'm an organized person.
But I'm not.

Well, at least not naturally. I definitely have to work at it!

I have found that if I have a plan to get organized, I can stay organized. I get a little overwhelmed at times getting started though. That's why I've taken this summer to get on top of things. Well, one thing- MATH.  I thought about what bothers me in my class, and one of the things that really bugs me is the stacks of papers I tend to collect. I know why I collect stacks, and it's not that I'm one of those people that has tons of piles, but knows where everything is. I just don't know what to do with the papers when I'm done with them, so I lay them in a stack. (No Judge Zone here, right?!)

Now, I will have no excuse! I have made binders, page dividers, and even hanging file tabs to help me create a place for everything. It was pretty easy, and I happily invested the time to make my year go much more smoothly! You know what they say,

I originally thought about just organizing by the TEKS, but in the end, it didn't seem like it would help make putting things in their proper home easy enough.  I ended up organizing by skills. There were a lot of skills- 90 to be exact! I created a way to easily and inexpensively label all of my hanging files by skills. I even color-coded them so that related skills would be easy to find. But, I wanted to make sure that when I was finished with an activity, worksheet, or test, that I would put it back where it goes. I knew that the only way I would put it up was if it was quick and easy to do.  Thus, I created the activity labels.  

Hanging File Tabs by TEKS & Skill
Activity Labeling System
The activity labels are just the skill and the TEKS that the activity covers. I will stick it to the back of the worksheet, and when it is time to file it away, I can do it with no thought or time! I can also stick it to my center activities storage boxes, task card stacks, or whatever!

I was starting to feel better about my organization!

But, then I remembered that most of my papers go in binders, not files. :(

Well, I had to get my binders organized and set up so that putting things back into the binders was painless.  I created covers and spines for my binders, but then also created binder divider pages to go in the binders. I used the same 90 skills that I had used for my hanging files and created tabs to go on them so that my sections were easily accessible.

Fat binders for my big categories and skinny binders for my little categories!
The page dividers have a lot of info on them, and the tabs are just made from mailing labels!
So, now I'm all ready to stay organized!  You can get organized too!!! You just need some mailing labels, cardstock, and a little time! Use the return address labels for the hanging file tabs, and use the the mailing address labels for the tabs on your binder divider pages. I just opened up word, clicked on mailings, and then clicked on labels.  I typed in my skills on the labels and printed them out.  It really didn't take too long at all, and now I can save tons of time throughout the year! HOPEFULLY, THEY WON'T CHANGE THE TEKS TOO SOON!!!

If you're lucky enough to teach 4th grade math in Texas, you can just get my stuff that I've already created! Click here! 


Good Luck! I'd love to hear some of your organization tips! Please leave a comment!


July 23, 2015

ABRACADABRA..........

I'm finally done with my giant Auto Fill Teacher Organization System I've been working on!

At the bottom of the blog, you can enter the raffle to win this awesome product! Plus, you can visit all the other link up authors to see what awesome products they're giving away!


WATCH THIS SHORT VIDEO!!!!


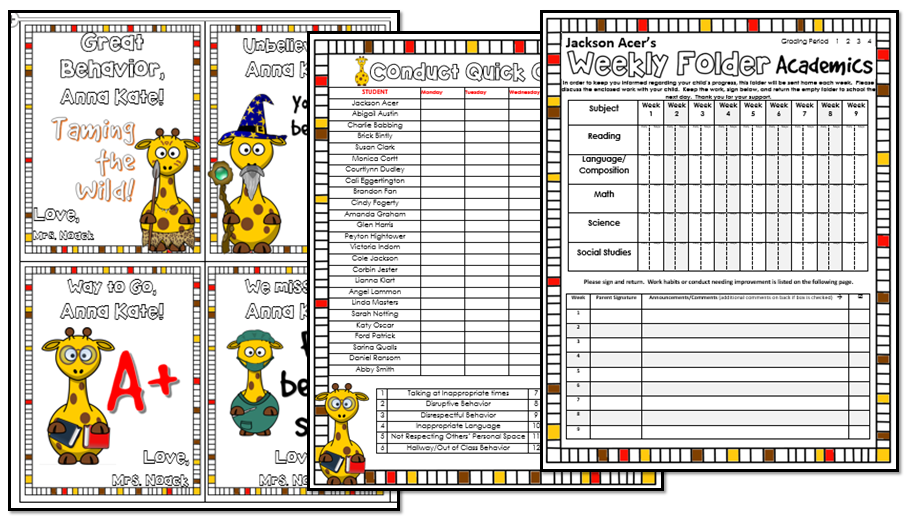
My favorite part about it all is that it can AUTOMATICALLY create LOTS and LOTS of different forms, checklists, and charts---filled in with your students! If you need a homework check sheet, VOILA! With one click, your checklist already includes your students' names.  Need a student contact list?  DONE! Your students' email addresses and phone numbers are there for you to print.  IT'S GREAT!!!! (Can you tell that I'm excited?!?!)

Here are some of my favorite Auto Fill Documents:

These are some of my favorites! They're all AUTO FILL and there are TONS of options! Plus it's editable!!!

AND GET ORGANIZED


Put together a whole binder system and organize it any way you want!

Binder Spines & Covers.... AUTO FILL
All Different Sizes!


 Click here to see the other authors for your chance to win!!

BUT WAIT, THERE'S MORE! LOL!


If you WIN my awesome organization system, I will also give you my Back to School Memes to teach rules and procedures (my best selling product) and my Classroom Rotation system FREE!!!! It's based on my own system I use in my classroom, but is ready to print and customize with your students!

If you don't win, I'll still give you my Class Rotation System when you sign up for my newsletter! It's full of technology tips and teaching tricks...plus FREEBIES!!! So, what are you waiting for??? SUBSCRIBE!!!
For a chance to win even more Freebies, check out the other authors in the Texas Size Link Up! Look down for all the authors!!!


a Rafflecopter giveaway

July 22, 2015

The World Is A Rainbow

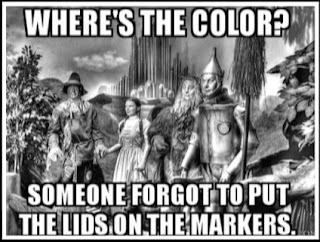
I was pinning some teacher memes on Pinterest last night, and this one caught my eye!

I'm pretty sure it was because I was super stoked that the mailman finally delivered my long awaited T   K!


If you love memes as much as me, check this out!

So, What is Instant Ink?

If you are a teacher that ever gets on Pinterest, you have surely fallen in love with some of the amazing back-to-school classroom decorations that are plastered over everyone's boards. Whether it's owls or superheroes, (OR GIRAFFES!!!) you know you NEED it for your class.  I found this.... and I'm pretty sure I NEED it!

BUT THE COST OF INK!!!!!!!

Instant Ink is great because you can print absolutely any document for only three cents! All that color?!?! Don't worry about it!
By the way, my friend, Jacqueline, made this awesome set!


I recently heard about Instant Ink.  It's a product that HP sells to take the worry out of printing in color. Basically, you pay a monthly fee, and then you can print up to a certain number of pages a month. If you go over, you pay per page at the same rate as the subscription.  If you don't use them all, they roll over into the next month. I subscribed to the $9.99 plan, and I can print 300 pages per month.


The Instant Ink Ad that came with my new printer. 

Included in my first shipment were extra high capacity cartridges and a postage paid return bag.
It's really simple.  I put the cartridges in my printer, and HP tracks the number of pages I've printed and the amount of ink still available in the cartridge. When it begins to run low, HP automatically sends a new one. There's no shipping charges coming or going!

PROS:

  • You can print all those task cards and teacher resources with no guilt or worry.
  • You can print photographs in full color.
  • You'll never have to go to the store to buy ink again.
  • You'll never run out of ink while mid-project.
  • Instant ink can be much cheaper than traditional cartridges.
  • You can get a month free with the code FREEINK at checkout.
  • (I guess you could even get your free month, print 300 posters for your class, and then cancel after your month so your classroom decorations would be provided by HP.)
  • You can cancel anytime. 

CONS:

  • If you print a lot of black and white documents, it may actually be much more expensive. You are paying for 300 pages.  It doesn't make a difference if that page has one tiny word on it or if it is completely saturated with colored ink. Either way, it costs three cents. 
  • If you go over the 300, you are automatically charged for the extra pages you have printed.
  • You have to have a computer that's compatible with Instant Ink. Click here to see those. I bought a new one just so I could get Instant Ink.  It was on sale for $99 at Office Depot, and it is awesome!

MY ADVICE:

  • If you print in color a lot, get it!  If you don't, you'd be better off buying the high-capacity cartridges at the office supply store.
  • Keep two printers at your house: one for black/white printing and one for colored printing.
  • Keep track of your own printing for a couple of months to see how many copies you actually use.
  • Keep a mental note of every time the thought of printing in color deters you from buying something on TpT or completing a particular lesson.


MUCH BETTER!

July 19, 2015

What Can You Say In Only 4.6" by 1.5"?

A whole lot more than you may think!


Make the most of the space you're given on your Teachers Pay Teachers store front!

You can do this by creating a gif for your "Personal Quote" section of your bio.  A gif is an image that scrolls through a series of other images.  If you use good design, you can really catch the eye of your shoppers. The longer a shopper stays in your store, the more likely he or she is to purchase!


Watch this tutorial as I walk you through every step to creating your own flashing billboard.


Step 1:

Create a series of images in PowerPoint

  • Be sure and set your slide to 4.6" wide by 1.5" tall
  • Save your images as JPEGs by clicking Save As JPEG, and then exporting all of the slides
Step 2:

Use gifmaker.me to compile your images into one image.
  • Click Upload Images and choose your JPEGs
  • Set the Canvas Size to 450 pixels by 150 pixels
  • Change your Animation Speed, if desired
  • Click Create GIF Animation
  • Click Download this GIF
  • Right click on your image, then click Save As, and save the image.
Step 3:

Use tinypic.com to gather HTML Code for TpT
  • Upload your image by clicking Choose File
  • Then click Upload Now (and suffer through the ads, LOL!)
  • Click "Click Here" to view your image
  • Copy the code under HTML FOR WEBSITES
Step 4:

Edit your profile
  • Go to your dashboard in TpT, and click on Edit Profile
  • Paste the HTML into Personal Quote
  • Scroll down and click Save
Step 5:

  • Go back into Edit Profile
  • Delete the code between the first quotation mark and the second quotation mark
  • Paste your store's URL or one of your store categores in between those question marks
  • Scroll down and click Save

THAT'S IT!


After you're done, link to your store front in the comments!  We want to see!!!


July 14, 2015

Not a Sex Ed Teacher

Confession: I had a near You-tube catastrophe while teaching 4th grade science!

Yah. You can imagine.

 You-tube is such a wonderful resource to use with your students! You can sing songs, watch problems being solved, and flip your classes--- and I do all of these often!  However, I have to be so careful when showing videos. I'll never forget the time we were watching a video about mixtures and macaroni salad and an ad for the movie Sex Tape POPPED UP!!!   OMG! (I did find irony in the situation though. Sex Tape is about a couple trying to keep everyone from seeing their inappropriate video, and I was trying to keep everyone in the class from seeing an inappropriate video.)

I'm normally a slow-paced person, but I moved like a ninja that morning trying to shield my students from the video and audio that seemed to invade every corner of the room at lightning speed. Needless to say, from that day forward, I never felt comfortable showing a You-tube video to my class.  WHAT A SHAME, RIGHT?!

But wait… it doesn’t end there, and I can now show You-tube videos with no hesitation!

I found safeshare.tv and all is good! In three easy steps, you can ensure that your videos don’t come with inappropriate ads or those awful trolling comments.

STEP 1:  Find your YouTube video’s URL.    (By the way, this is a great video!) https://www.youtube.com/watch?v=Vt7lN4QPU0k
You-tube videos for your students.


STEP 2: Open Safe Share by visiting safeshare.tv. Paste the URL from You-tube into the box and click Generate Safe Link.


STEP 3: Click Take Me to the Safe View.
 
SafeShare.tv opens the video in a new safe window!


That’s it! No advertisements, no alternate video suggestions, and no nasty comments! You’re left with good, clean material to help your students learn!  TRY IT!!!!  (And just in case you're wondering, my ninja skills saved the day, and none of my students were actually exposed to anything inappropriate that day!)


Have you ever had a You-tube CATASTROPHE while teaching your students? If so, share in the comments!

Use Safeshare.TV