Facebook Pinterest Teachers Pay Teachers You Tube Image Map

August 3, 2015

Get Organized!

It's Back to School Time...Time to Get Organized!

I'd like to think I'm an organized person.
But I'm not.

Well, at least not naturally. I definitely have to work at it!

I have found that if I have a plan to get organized, I can stay organized. I get a little overwhelmed at times getting started though. That's why I've taken this summer to get on top of things. Well, one thing- MATH.  I thought about what bothers me in my class, and one of the things that really bugs me is the stacks of papers I tend to collect. I know why I collect stacks, and it's not that I'm one of those people that has tons of piles, but knows where everything is. I just don't know what to do with the papers when I'm done with them, so I lay them in a stack. (No Judge Zone here, right?!)

Now, I will have no excuse! I have made binders, page dividers, and even hanging file tabs to help me create a place for everything. It was pretty easy, and I happily invested the time to make my year go much more smoothly! You know what they say,

I originally thought about just organizing by the TEKS, but in the end, it didn't seem like it would help make putting things in their proper home easy enough.  I ended up organizing by skills. There were a lot of skills- 90 to be exact! I created a way to easily and inexpensively label all of my hanging files by skills. I even color-coded them so that related skills would be easy to find. But, I wanted to make sure that when I was finished with an activity, worksheet, or test, that I would put it back where it goes. I knew that the only way I would put it up was if it was quick and easy to do.  Thus, I created the activity labels.  

Hanging File Tabs by TEKS & Skill
Activity Labeling System
The activity labels are just the skill and the TEKS that the activity covers. I will stick it to the back of the worksheet, and when it is time to file it away, I can do it with no thought or time! I can also stick it to my center activities storage boxes, task card stacks, or whatever!

I was starting to feel better about my organization!

But, then I remembered that most of my papers go in binders, not files. :(

Well, I had to get my binders organized and set up so that putting things back into the binders was painless.  I created covers and spines for my binders, but then also created binder divider pages to go in the binders. I used the same 90 skills that I had used for my hanging files and created tabs to go on them so that my sections were easily accessible.

Fat binders for my big categories and skinny binders for my little categories!
The page dividers have a lot of info on them, and the tabs are just made from mailing labels!
So, now I'm all ready to stay organized!  You can get organized too!!! You just need some mailing labels, cardstock, and a little time! Use the return address labels for the hanging file tabs, and use the the mailing address labels for the tabs on your binder divider pages. I just opened up word, clicked on mailings, and then clicked on labels.  I typed in my skills on the labels and printed them out.  It really didn't take too long at all, and now I can save tons of time throughout the year! HOPEFULLY, THEY WON'T CHANGE THE TEKS TOO SOON!!!

If you're lucky enough to teach 4th grade math in Texas, you can just get my stuff that I've already created! Click here! 


Good Luck! I'd love to hear some of your organization tips! Please leave a comment!


July 23, 2015

ABRACADABRA..........

I'm finally done with my giant Auto Fill Teacher Organization System I've been working on!

At the bottom of the blog, you can enter the raffle to win this awesome product! Plus, you can visit all the other link up authors to see what awesome products they're giving away!


WATCH THIS SHORT VIDEO!!!!


My favorite part about it all is that it can AUTOMATICALLY create LOTS and LOTS of different forms, checklists, and charts---filled in with your students! If you need a homework check sheet, VOILA! With one click, your checklist already includes your students' names.  Need a student contact list?  DONE! Your students' email addresses and phone numbers are there for you to print.  IT'S GREAT!!!! (Can you tell that I'm excited?!?!)

Here are some of my favorite Auto Fill Documents:

These are some of my favorites! They're all AUTO FILL and there are TONS of options! Plus it's editable!!!

AND GET ORGANIZED


Put together a whole binder system and organize it any way you want!

Binder Spines & Covers.... AUTO FILL
All Different Sizes!


 Click here to see the other authors for your chance to win!!

BUT WAIT, THERE'S MORE! LOL!


If you WIN my awesome organization system, I will also give you my Back to School Memes to teach rules and procedures (my best selling product) and my Classroom Rotation system FREE!!!! It's based on my own system I use in my classroom, but is ready to print and customize with your students!

If you don't win, I'll still give you my Class Rotation System when you sign up for my newsletter! It's full of technology tips and teaching tricks...plus FREEBIES!!! So, what are you waiting for??? SUBSCRIBE!!!
For a chance to win even more Freebies, check out the other authors in the Texas Size Link Up! Look down for all the authors!!!


a Rafflecopter giveaway

July 22, 2015

The World Is A Rainbow

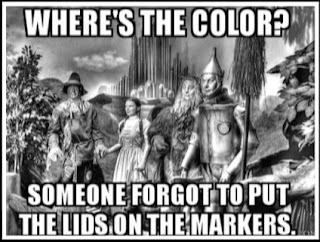
I was pinning some teacher memes on Pinterest last night, and this one caught my eye!

I'm pretty sure it was because I was super stoked that the mailman finally delivered my long awaited T   K!


If you love memes as much as me, check this out!

So, What is Instant Ink?

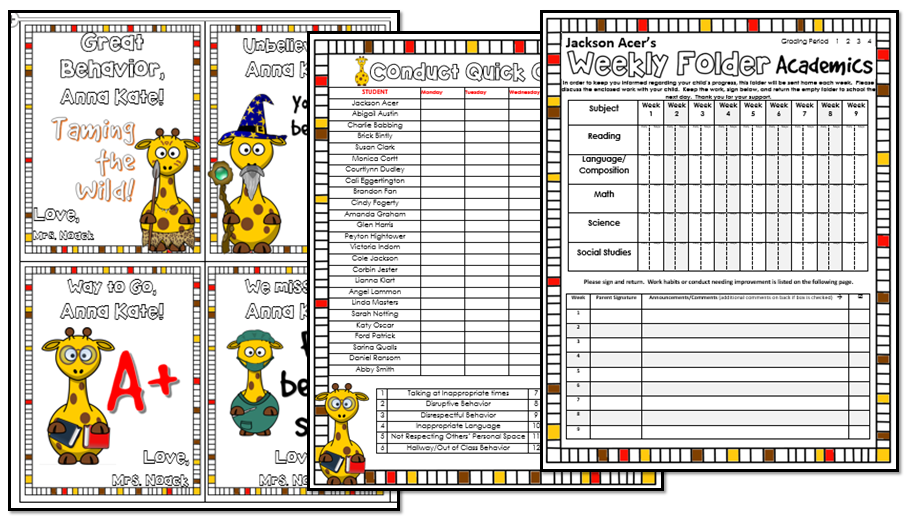
If you are a teacher that ever gets on Pinterest, you have surely fallen in love with some of the amazing back-to-school classroom decorations that are plastered over everyone's boards. Whether it's owls or superheroes, (OR GIRAFFES!!!) you know you NEED it for your class.  I found this.... and I'm pretty sure I NEED it!

BUT THE COST OF INK!!!!!!!

Instant Ink is great because you can print absolutely any document for only three cents! All that color?!?! Don't worry about it!
By the way, my friend, Jacqueline, made this awesome set!


I recently heard about Instant Ink.  It's a product that HP sells to take the worry out of printing in color. Basically, you pay a monthly fee, and then you can print up to a certain number of pages a month. If you go over, you pay per page at the same rate as the subscription.  If you don't use them all, they roll over into the next month. I subscribed to the $9.99 plan, and I can print 300 pages per month.


The Instant Ink Ad that came with my new printer. 

Included in my first shipment were extra high capacity cartridges and a postage paid return bag.
It's really simple.  I put the cartridges in my printer, and HP tracks the number of pages I've printed and the amount of ink still available in the cartridge. When it begins to run low, HP automatically sends a new one. There's no shipping charges coming or going!

PROS:

  • You can print all those task cards and teacher resources with no guilt or worry.
  • You can print photographs in full color.
  • You'll never have to go to the store to buy ink again.
  • You'll never run out of ink while mid-project.
  • Instant ink can be much cheaper than traditional cartridges.
  • You can get a month free with the code FREEINK at checkout.
  • (I guess you could even get your free month, print 300 posters for your class, and then cancel after your month so your classroom decorations would be provided by HP.)
  • You can cancel anytime. 

CONS:

  • If you print a lot of black and white documents, it may actually be much more expensive. You are paying for 300 pages.  It doesn't make a difference if that page has one tiny word on it or if it is completely saturated with colored ink. Either way, it costs three cents. 
  • If you go over the 300, you are automatically charged for the extra pages you have printed.
  • You have to have a computer that's compatible with Instant Ink. Click here to see those. I bought a new one just so I could get Instant Ink.  It was on sale for $99 at Office Depot, and it is awesome!

MY ADVICE:

  • If you print in color a lot, get it!  If you don't, you'd be better off buying the high-capacity cartridges at the office supply store.
  • Keep two printers at your house: one for black/white printing and one for colored printing.
  • Keep track of your own printing for a couple of months to see how many copies you actually use.
  • Keep a mental note of every time the thought of printing in color deters you from buying something on TpT or completing a particular lesson.


MUCH BETTER!

July 19, 2015

What Can You Say In Only 4.6" by 1.5"?

A whole lot more than you may think!


Make the most of the space you're given on your Teachers Pay Teachers store front!

You can do this by creating a gif for your "Personal Quote" section of your bio.  A gif is an image that scrolls through a series of other images.  If you use good design, you can really catch the eye of your shoppers. The longer a shopper stays in your store, the more likely he or she is to purchase!


Watch this tutorial as I walk you through every step to creating your own flashing billboard.


Step 1:

Create a series of images in PowerPoint

  • Be sure and set your slide to 4.6" wide by 1.5" tall
  • Save your images as JPEGs by clicking Save As JPEG, and then exporting all of the slides
Step 2:

Use gifmaker.me to compile your images into one image.
  • Click Upload Images and choose your JPEGs
  • Set the Canvas Size to 450 pixels by 150 pixels
  • Change your Animation Speed, if desired
  • Click Create GIF Animation
  • Click Download this GIF
  • Right click on your image, then click Save As, and save the image.
Step 3:

Use tinypic.com to gather HTML Code for TpT
  • Upload your image by clicking Choose File
  • Then click Upload Now (and suffer through the ads, LOL!)
  • Click "Click Here" to view your image
  • Copy the code under HTML FOR WEBSITES
Step 4:

Edit your profile
  • Go to your dashboard in TpT, and click on Edit Profile
  • Paste the HTML into Personal Quote
  • Scroll down and click Save
Step 5:

  • Go back into Edit Profile
  • Delete the code between the first quotation mark and the second quotation mark
  • Paste your store's URL or one of your store categores in between those question marks
  • Scroll down and click Save

THAT'S IT!


After you're done, link to your store front in the comments!  We want to see!!!


July 14, 2015

Not a Sex Ed Teacher

Confession: I had a near You-tube catastrophe while teaching 4th grade science!

Yah. You can imagine.

 You-tube is such a wonderful resource to use with your students! You can sing songs, watch problems being solved, and flip your classes--- and I do all of these often!  However, I have to be so careful when showing videos. I'll never forget the time we were watching a video about mixtures and macaroni salad and an ad for the movie Sex Tape POPPED UP!!!   OMG! (I did find irony in the situation though. Sex Tape is about a couple trying to keep everyone from seeing their inappropriate video, and I was trying to keep everyone in the class from seeing an inappropriate video.)

I'm normally a slow-paced person, but I moved like a ninja that morning trying to shield my students from the video and audio that seemed to invade every corner of the room at lightning speed. Needless to say, from that day forward, I never felt comfortable showing a You-tube video to my class.  WHAT A SHAME, RIGHT?!

But wait… it doesn’t end there, and I can now show You-tube videos with no hesitation!

I found safeshare.tv and all is good! In three easy steps, you can ensure that your videos don’t come with inappropriate ads or those awful trolling comments.

STEP 1:  Find your YouTube video’s URL.    (By the way, this is a great video!) https://www.youtube.com/watch?v=Vt7lN4QPU0k
You-tube videos for your students.


STEP 2: Open Safe Share by visiting safeshare.tv. Paste the URL from You-tube into the box and click Generate Safe Link.


STEP 3: Click Take Me to the Safe View.
 
SafeShare.tv opens the video in a new safe window!


That’s it! No advertisements, no alternate video suggestions, and no nasty comments! You’re left with good, clean material to help your students learn!  TRY IT!!!!  (And just in case you're wondering, my ninja skills saved the day, and none of my students were actually exposed to anything inappropriate that day!)


Have you ever had a You-tube CATASTROPHE while teaching your students? If so, share in the comments!

Use Safeshare.TV


March 28, 2015

Setting up Rotations

Differentiation at its best!

Setting up a rotation system can be daunting! There are so many things to think of logistically, and of course, there is so little time to make changes to the daily rotations. This is my current system for my 4th grade math class, and it is working wonderfully!


I used masking tape to create the grid on my magnetic whiteboard. I have four groups and four rotations, so I made a 5 by 4 grid.  The first column is to write a brief description about each rotation. All of the rotation icons were made using foam sheets, a Sharpie, and magnetic tape, all of which were purchased for a few bucks at Wal-Mart.  The magnetic tape was AWESOME! It isn't very strong, but it is perfect for the foam sheet.  It is very thin and doesn't peel off the way that the thicker magnetic strips I've used in the past have. Each student also has a magnetic name so that my groups remain fluid and are quickly changed.

I have lots of different icons, and the students love that the routine changes up often.  I also have little notes and reminders that can be placed in any rotation, such as "bring your book" or "DUE TODAY." If an activity will take longer than one rotation period, I use arrows to extend into the next rotation period.  I also have group work icons, and if I don't have an icon for a particular activity, I can just write on the whiteboard with a dry erase marker. Not all students will complete the same activities.  Sometimes I will group all of the GT kids together and give them an activity to work on. Sometimes I will have the same group come to the teacher rotation twice so I can give them a little extra attention.  I may have two groups work at the computer and two groups play math games instead of computer time.  Rotations make it extremely easy to differentiate and allows kids to build independence and take ownership of their learning.


Each rotation has a brief description of the day's expectations, and there are "turn-in" areas located around the class. The icon on the turn-in station matches the icon on the rotation board.  This area includes any materials the students will need to finish the assignment. The black mesh file sorter (also purchased at Wal-Mart for around $6) is compartmentalized. My two separate classes know their designated area for turning in the completed assignment and do it in number order for easy grading and filing later. Having these turn-in stations set up around the class cuts down on confusion over where to get papers and materials and where to turn in completed projects.

The very best part about having rotations is that it gives the teacher time to work in small groups with each and every student each and every day! It is the best way to collect data and formatively assess student understanding. Plus, it is much easier to keep students engaged and participatory when there are only 4-6 students.  I keep a bucket of dry erase markers and erasers at my round table and the students LOVE writing on the table as they do their work!


Visit Cassi's profile on Pinterest.
Please comment to share some of your tips and tricks to using rotation boards in your classroom!

March 21, 2015

GradeCam Post #3

I've now spent quite a bit of time playing around with GradeCam, and I have to say that IT IS COOL!

Here's how I have used it so far...

In preparation for the STAAR Test (Texas' achievement test), I developed a way of differentiating the homework to meet each individual student's needs. Because it is tailored to each child, I have a lot of different homework to grade, but  I never dreamed it would be the feat that it has been.  I have 39 different quizzes that the students have available to them to practice the various standards (TEKS).  That means I can have up to 39 different papers each day to grade. Keeping up with the keys, and recording their grade on my spreadsheet and on their goals sheet has been EXTREMELY difficult!

On Friday, I tried GradeCam, and it was indeed a game changer! I had the students turn their bubble sheets in different stacks so that I didn't have to sort them myself.  When I was ready to grade, I opened the assignment in GradeCam, and it literally took a second to grade each one.  The missed answers were immediately displayed so that I could circle any wrong answers on the bubble sheets. The students' grades were recorded for me (I use the scores for formative assessment), and I simply handed them back their bubble sheet to record their grade on their goals sheet. DONE! Individual differentiation is possible!

Here is a screen shot of some of the reporting features in GradeCam.


I also figured out how to transfer the grades directly into my grade book, which is Eduphoria Gradespeed.  It took NO setting up, changing settings, or anything. You simply open your grade book, create a new assignment, and press F8 when you wish to transfer. EASY!

I have put my first GradeCam ready product on Teachers Pay Teachers.  Check it out!